Garden with Insight v1.0 Help: How to make a new tool
To make a new tool, first choose Tools from the Edit menu on
the garden window to open the tool
editor.

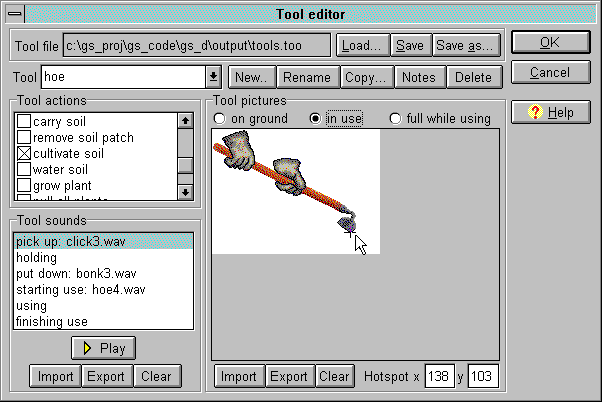
The tool editor window
In the tool editor, click on the New button next to the box labeled Tool. A dialog
will appear asking for a name for the new tool. Type in a name and click OK. Your new tool
will appear as selected in the list.
Now you need to choose actions, pictures, and sounds for your new tool. Actually, only actions and
pictures are required; sounds are optional.
Actions
First, in the Tool actions panel, check any actions you want your tool to carry out. For more
details, see How to change a tool's actions.
Pictures
In the Tool pictures panel, import a picture for the on the ground and in
use picture states by clicking on the Import button in the pictures panel and choosing a file.
If you include the carry soil or carry mulch actions,
you also need a picture for the full while using picture state. For each picture you must set the
hotspot by clicking on the picture where you want the cursor to be
while you are using the tool. For more details, see How to change a tool's
pictures.
Sounds
In the Tool sounds panel, choose a sound file for any of the sound phases you want to play a
sound by selecting the sound phase in the list box, clicking Import, and choosing a file. Click
Play to play the sounds. For more details, see How to change a
tool's sounds.
When you are finished, click OK to save your new tool. In the garden window, you should see your new tool. If you do not see your new
tool on the screen, pick it from the tool box on the toolbar; it may have started off the screen.
| 
